Project Mounting Boards
Building Raspberry Pi and Arduino projects can get messy if you have the microcontroller, a breadboard and other devices all hooked up with loose wires.
Every time you have to move them you risk pulling out a wire and having to figure out where it was supposed to go.
Adafruit and others sell some acrylic project boards but these can be a bit cramped for some of my designs.
My solution is to mount my projects on small Artist Boards - small wooden frames that support a smooth wood panel that are used for small oil paintings, and other art projects.
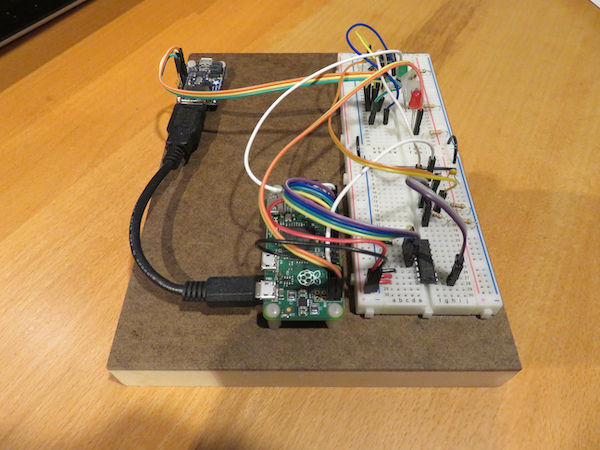
They look good, all the components and wires stay in place and your projects are easy to store.
I use Ampersand Museum Series Panels - specifically their hardbord (sic) panels.
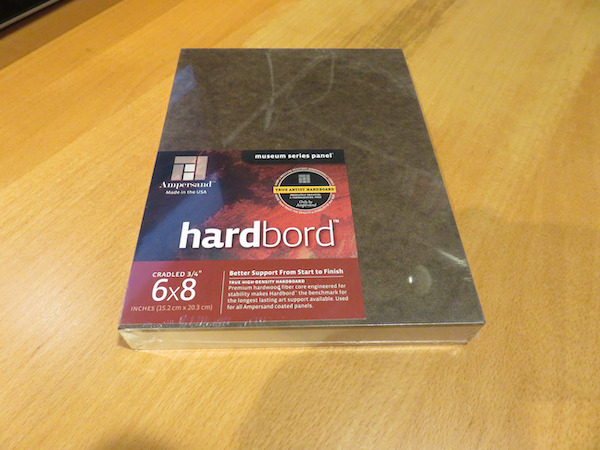
These are not generally available on Amazon but you can find them on the website for Blick art supplies.
I get the 3/4 inch cradled Hardbord type which have a smooth brown face and a 3/4 inch supporting frame. The finish is great and they look really professional.
They are available in sizes from 6” x 6” up to 24” x 36”. I typically get the 6” x 8” panels which cost around $10 each.
How to mount circuit boards to the project board
Mounting holes in Arduino, Raspberry Pi and other circuit boards tend to be 2.5 mm.
Nylon standoffs and screws in this size are a good way to mount boards securely on a panel.
These are available as sets from Adafruit for around $15 each, as well as from various sellers on Amazon.
White Nylon Screw and Stand-off Set – M2.5 Thread
Black Nylon Screw and Stand-off Set – M2.5 Thread
In the US nobody has metric drill bits … because … however, you can use a 3/32 in drill bit which is 2.4 mm
-
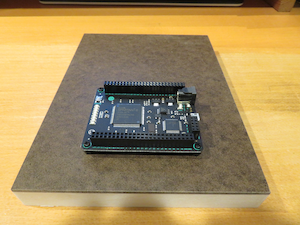
Place the circuit board on the panel in the desired location and mark the mounting holes on the panel, keeping away from the supporting frame.
-
Drill the holes in the panel.
-
Gently screw a 2.5 mm standoff with a ‘male’ extension into each hole - they should fit tightly when you screw them in hand tight - no need for a nut on the other side of the panel.

- Place the board over the ‘female’ end of the standoff and screw in a 2.5mm bolt through the board into the standoff.
If you want to add a breadboard on the panel, these often come with double sided tape on their base, so just stick this in place next to your board.